XABCDE Trauma Assessment: A Complete Practical Guide
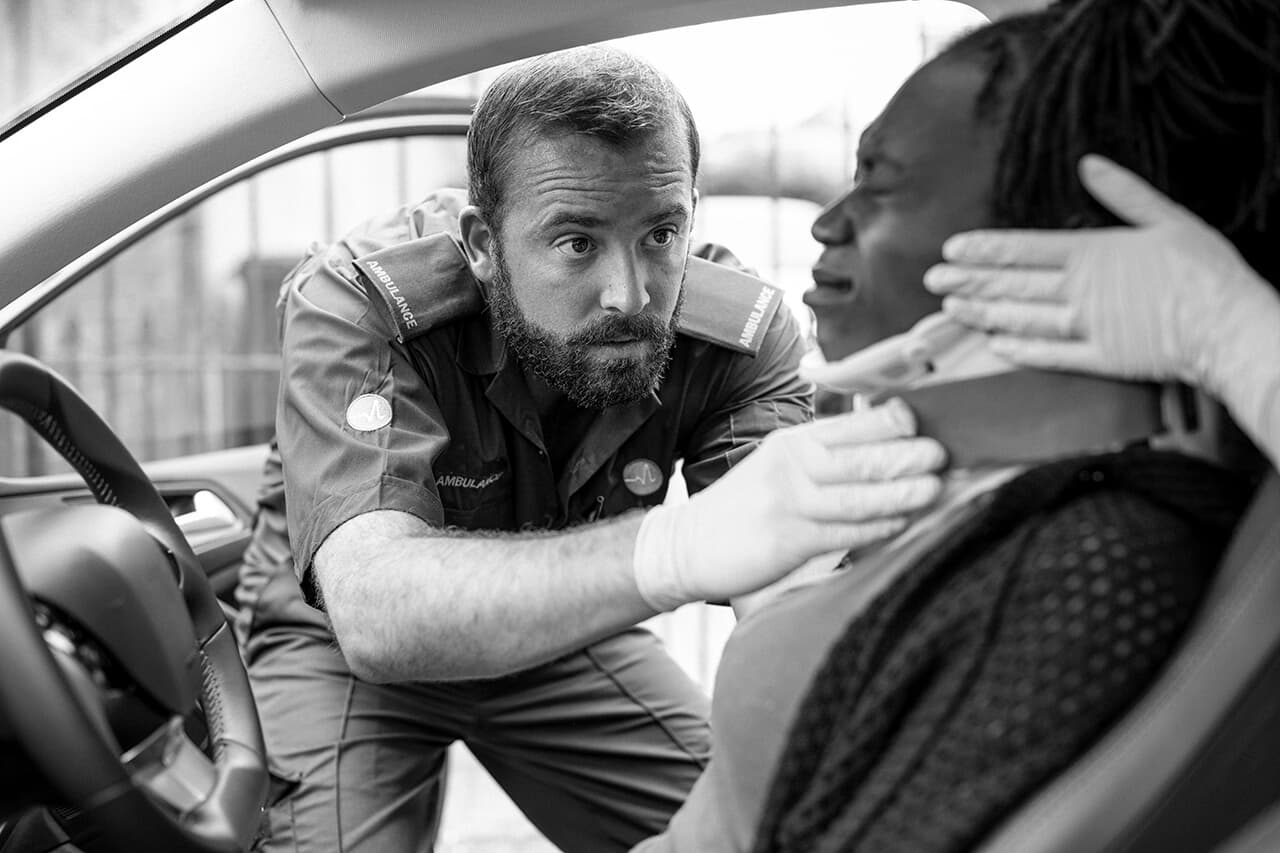
In trauma emergencies, acting quickly, clearly and precisely can make the difference between life and death. To do that, nurses need tools that organize clinical reasoning and decision-making under pressure. Among these tools, the XABCDE trauma protocol stands out as one of the most effective and most widely used in prehospital and in-hospital care.
This protocol, adopted by many health systems and taught in courses such as PHTLS (Prehospital Trauma Life Support), guides the primary survey of the trauma patient and sets priorities for immediate, systematic interventions. Each letter stands for a critical step in the care of the multiple-trauma patient, in a logical sequence that aims to stabilize the patient and keep the condition from getting worse.
In this article you will find a complete guide to the XABCDE trauma protocol, with clear explanations of each step, practical examples, tips for applying it in the field and specific points of attention for nursing in emergency situations.
By the end, you will understand why mastering this protocol is essential for any professional who cares for trauma patients, whether in ambulances, urgent care centers, emergency departments or hospital wards.
Origin and evolution of the XABCDE trauma protocol
The XABCDE trauma protocol, widely used in prehospital and hospital care, has a history shaped by painful lessons and major advances in emergency medicine. It goes back to the 1970s, when orthopedic surgeon Dr. Jim Styner, after a serious plane crash with his family, saw critical failures in the way trauma victims were cared for at the scene.
Styner's personal experience, surviving the crash and witnessing the poor care he received, led to the development of a standardized protocol based on clinical priorities, which gave rise to the well-known ABCDE of trauma. From 1978 on, this model was adopted systematically in many countries, becoming a milestone in the approach to the multiple-trauma patient and a core reference in the training of health professionals, especially in emergency nursing.
Over time, following the clinical evidence, the protocol went through important changes. One of the most significant came in 2018, when the letter "X" was added to the original sequence. The "X" stands for exsanguinating hemorrhage: severe external bleeding that must be controlled before any other intervention, including airway management.
This update did more than refine the protocol. It shifted the clinical focus, because a massive hemorrhage can kill within minutes and therefore demands an immediate, top-priority response.
That is how the XABCDE of trauma came about: a model that combines rapid assessment with immediate interventions and is now the gold standard for initial trauma care, taught in courses such as PHTLS, ATLS and BLS. Used well, it can save lives in the critical first minutes after a traumatic event.
What is the XABCDE trauma protocol?
XABCDE is a clinical mnemonic that guides the primary survey and initial care of multiple-trauma patients. It is a systematic protocol that puts in order of priority the steps health professionals must follow, especially in prehospital and emergency care.
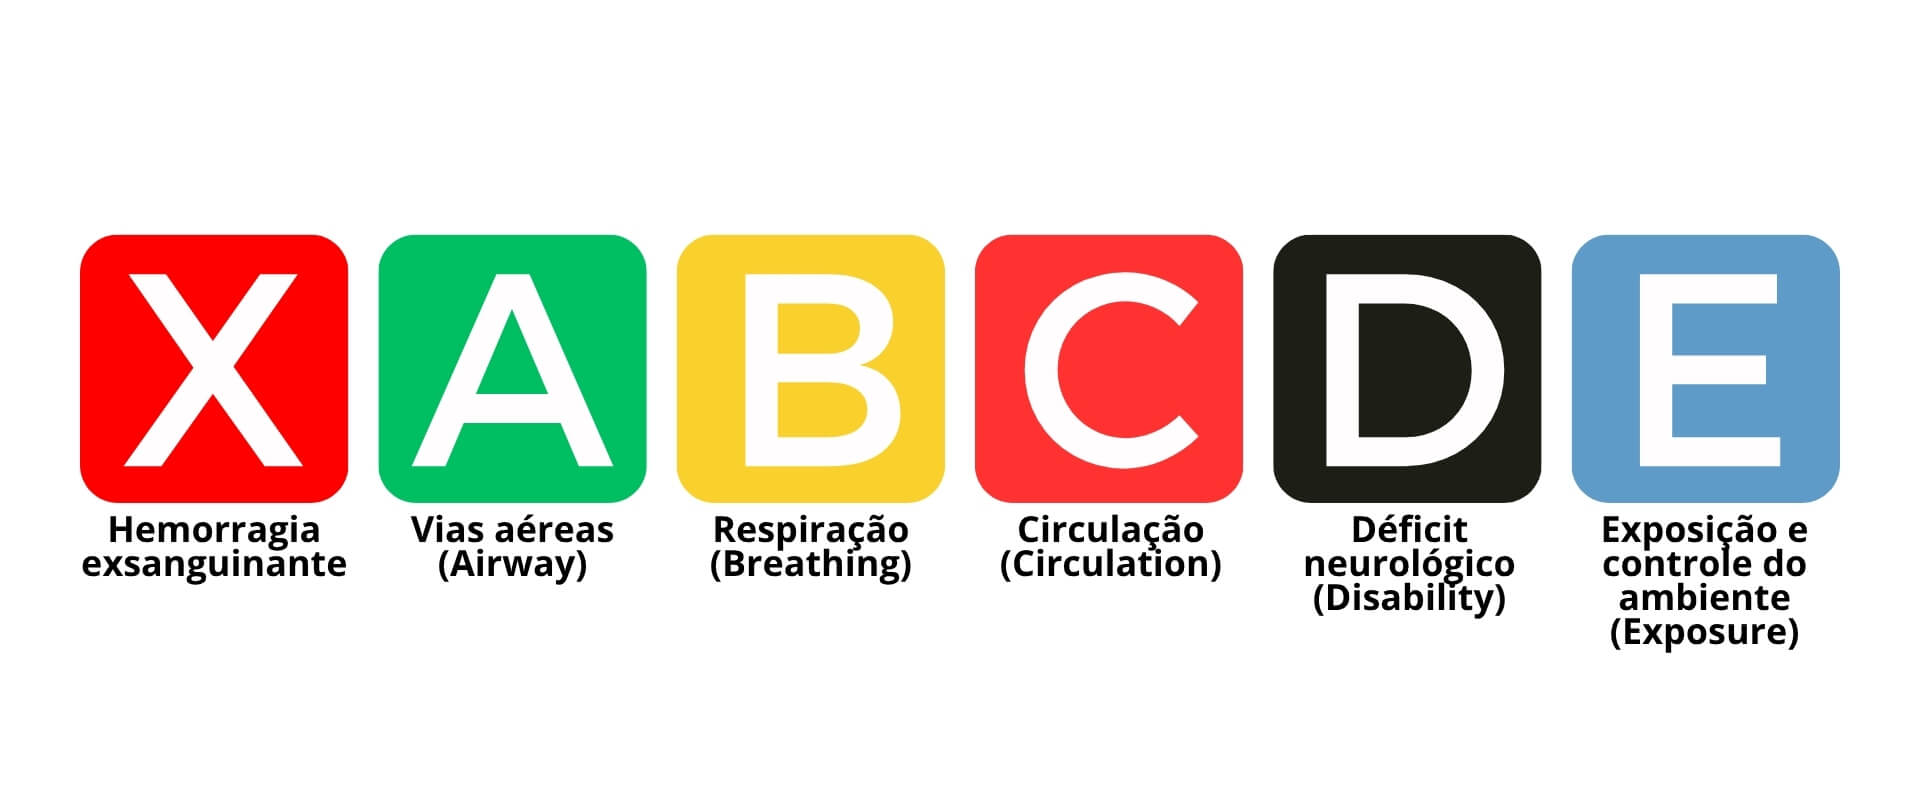
Each letter of XABCDE stands for a critical, sequential step in the approach to trauma:
- X – Exsanguinating hemorrhage
- A – Airway
- B – Breathing
- C – Circulation
- D – Disability (neurological deficit)
- E – Exposure and environmental control
The main goal of the protocol is to prioritize life-saving actions, so that no fatal condition is missed in the first minutes of care. In emergencies, where decisions must be made quickly, XABCDE provides a logical, safe structure that reduces errors and improves clinical outcomes.
Although the mnemonic looks simple, applying it in practice takes technical knowledge, training and decision-making under pressure. A nurse working in trauma care must know more than the order of the letters: they must quickly recognize critical signs, start the right interventions and work with the multidisciplinary team.
In the next sections you will find a detailed explanation of each XABCDE step, with practical examples, clinical guidance and specific tips for nurses in trauma care.
Step X – Immediate control of exsanguinating hemorrhage
The first step of the XABCDE trauma protocol is the letter "X", for exsanguination: massive blood loss that puts the patient's life at immediate risk. Unlike the other steps, which follow the traditional order of the primary survey, control of exsanguinating hemorrhage comes before everything else, including airway assessment.
Why does "X" come before "A"?
Because a patient can die within minutes from uncontrolled loss of a large volume of blood. Severe, uncontrolled external bleeding quickly compromises tissue perfusion, leading to hypovolemia, hemorrhagic shock and, if not treated at once, death.
That is why the XABCDE protocol puts stopping visible bleeding first, in the first seconds of care.
How to act in the "X" phase: practical nursing actions
A fast, effective nursing response makes all the difference in this phase. The main interventions are:
- Apply direct pressure over the bleeding site with a sterile pad or an improvised dressing
- Use pressure dressings or hemostatic bandages, if available
- In more severe cases, apply a tourniquet to limbs with uncontrollable bleeding
- Immobilize the injured limb to avoid making the injury worse
- Reassess the site continuously after initial control
Tourniquet use: when and how
The tourniquet is an essential resource for limb exsanguination, but it must be used with proper technique and judgment. The nurse should apply it:
- 5 cm above the wound (never over a joint)
- Only for external hemorrhage where direct pressure has failed
- Recording the time of application so the hospital team can track it
Tourniquet use is now widely accepted in international protocols such as PHTLS, including in civilian settings, because it is effective for the temporary control of massive bleeding until the patient reaches the hospital.
Step A – Airway and cervical spine protection
The second step of the XABCDE trauma protocol is the letter "A", for assessment and management of the airway, with emphasis on protecting the cervical spine. The priority here is to make sure the patient's airway is patent, clear and protected, ensuring adequate ventilation and avoiding complications from a neck injury.
Initial airway assessment
The nursing team should start by looking for:
- Abnormal breath sounds (stridor, snoring)
- Signs of obstruction such as cyanosis, use of accessory muscles or retractions
- Whether the patient can speak or respond verbally
- Blood, vomit or a foreign body in the mouth or throat
When trauma is suspected, it is essential not to move the cervical spine more than necessary, since any improper movement can worsen neurological injuries.
Practical actions: clearing and maintaining the airway
If there is any degree of obstruction or risk, the nurse can use basic, effective techniques:
- Head tilt–chin lift: only in patients with no suspected cervical injury
- Jaw thrust: preferred in trauma with a possible cervical injury
- Suction of secretions or blood, if needed
- Insertion of an oropharyngeal (Guedel) airway: if the patient is unconscious and has no gag reflex
In more severe cases, with complete obstruction, advanced support with supraglottic devices or endotracheal intubation should be considered, which requires immediate medical support.
Cervical spine protection: a silent priority
Whenever a head injury or high-energy mechanism of injury is suspected, the cervical spine should be immobilized early with a rigid collar, before the patient is moved or transported.
The nurse must ensure:
- Correct application of the cervical collar
- Neutral alignment of the head and neck
- Monitoring of consciousness and neurological signs throughout care
Step B – Breathing and effective ventilation
The letter "B" in the XABCDE trauma protocol stands for breathing and ventilation. Once the airway is clear and protected, the next step is to check whether the patient is breathing effectively and whether oxygen is reaching the tissues.
In this phase, the nurse's focus is to identify breathing problems that put the patient's life at immediate risk, such as respiratory failure, hypoventilation, pneumothorax or open chest wounds.
Clinical assessment of breathing: what to look for
The assessment must be quick, systematic and ongoing. The main points are:
- Respiratory rate: tachypnea or bradypnea are warning signs
- Breathing pattern: shallow, irregular, with use of accessory muscles
- Chest movement: symmetrical or asymmetrical? Look for retractions and uneven rise
- Signs of cyanosis: on the lips, ears and extremities
- Breath sounds: wheezing, snoring, stridor or reduced breath sounds
- Perfusion: check capillary refill time and skin color
Pulse oximetry should be used whenever possible, but it never replaces direct clinical assessment, especially in low light, hypovolemic shock or exposure to cold.
Nursing interventions to improve ventilation
If the assessment shows breathing problems, the team must act quickly. The most common interventions include:
- Supplemental oxygen through a non-rebreather mask or nasal cannula
- Bag-valve-mask (BVM) ventilation for apnea or severe hypoventilation
- Sealing open chest wounds with occlusive dressings (open pneumothorax)
- Monitoring chest expansion and the clinical response to oxygen
- Calling for urgent medical intervention when tension pneumothorax, hemopneumothorax or rib fractures with lung involvement are suspected
Nursing in action: breathing is a vital priority
Nursing plays a key role in spotting early signs of respiratory deterioration and acting quickly, with the resources available in the prehospital or hospital setting.
Adequate ventilation is essential for effective tissue perfusion, and the success of the intervention depends on how quickly the problem is identified and how well supportive measures are applied.
Step C – Circulation and control of internal bleeding
The letter "C" in the XABCDE trauma protocol stands for circulation with hemorrhage control. With the airway and ventilation secured, the next step is to assess whether blood is reaching the tissues and whether there are signs of critical volume loss, especially from hidden bleeding.
In this phase, the nurse aims to identify early signs of hypovolemic shock, assess the patient's circulatory status and act quickly to maintain tissue perfusion and systemic oxygenation.
Assessing circulation: what to look for
The assessment must be immediate and ongoing. The main clinical signs are:
- Peripheral pulse: rapid (tachycardia), weak or absent
- Skin color: pale, gray or cyanotic
- Skin temperature: cold and clammy to the touch
- Capillary refill time: longer than 2 seconds (especially in the extremities)
- Blood pressure: hypotension in later stages
- Neurological status: agitation, drowsiness or confusion may indicate poor cerebral perfusion
The nurse should also watch for abdominal bruising, distension, and pelvic or femoral fractures, which may point to internal bleeding.
Nursing interventions in the "C" phase
When there are signs of circulatory compromise, some actions take priority:
- Control of external bleeding (if not done in step "X") with pads, bandages and tourniquets
- Continuous vital sign monitoring
- Large-bore IV access (ideally two 14G or 16G peripheral lines)
- IV fluids (as prescribed) for volume replacement in shock
- Raising the legs, when there is no contraindication (for example, a pelvic fracture)
- Preparing for rapid transfer to the operating room, if indicated
- Continuous reassessment of peripheral perfusion and neurological status
The nurse's role: monitor, act and anticipate
Controlling circulation and internal bleeding is essential to stop shock from progressing and to protect vital organs. The nurse needs to act promptly, interpret clinical data quickly and report any change to the medical team at once.
The ability to anticipate signs of hemodynamic decompensation can decide whether the patient survives until definitive treatment.
Step D – Disability: neurological assessment and level of consciousness
The letter "D" in the XABCDE trauma protocol stands for disability, the step that assesses the neurological status of the trauma patient in a quick, objective and focused way. At this point, the nurse should look for signs of neurological compromise that indicate brain injury, spinal cord injury or secondary cerebral hypoxia, all of which need immediate attention and can quickly make the patient's condition worse.
How to assess neurological function in trauma
The assessment starts with the level of consciousness, using a quick, structured approach. The main tool at this step is the Glasgow Coma Scale (GCS), which scores three responses:
- Eye opening (1 to 4 points)
- Verbal response (1 to 5 points)
- Motor response (1 to 6 points)
The total score ranges from 3 to 15 points:
- 13 to 15: mild injury
- 9 to 12: moderate injury
- ≤ 8: severe injury, requiring advanced airway management
The nurse should also look for:
- Pupil reactivity (equal or unequal pupils, reactive or fixed)
- Involuntary movements or lateralizing signs
- Response to painful stimuli
- Changes in behavior or agitation
- Signs of head or spinal cord injury
Nursing interventions for neurological changes
If neurological changes are found, the nurse should:
- Ensure adequate oxygenation to prevent cerebral hypoxia
- Keep the head of the bed raised to 30°, if possible, to lower intracranial pressure
- Monitor vital signs and level of consciousness serially
- Report any neurological deterioration to the medical team at once
- Be ready to assist with procedures such as intubation or sedation
- Record all findings clearly, with the exact time
Why neurological assessment matters in trauma
Early, ongoing neurological assessment is essential to detect hidden injuries and prevent rapid deterioration. A nurse's careful observation is decisive in catching subtle signs of worsening and making sure interventions happen in time.
Step E – Full exposure of the patient and environmental control
The letter "E" in the XABCDE trauma protocol stands for exposure. It is the last step of the primary survey, but no less important. Here the health professional fully exposes the patient for a thorough physical inspection, to find hidden injuries missed in the earlier steps.
Exposure is essential to detect:
- Hidden wounds, such as lacerations, abrasions and bruises
- Open or unstable fractures
- Foreign bodies or bleeding in covered areas
- Burns or thermal injuries
- Signs of abuse, neglect or violence (especially in vulnerable groups)
Care during exposure: avoid further harm
During exposure, the patient should be fully undressed quickly, systematically and respectfully, always prioritizing:
- Privacy and dignity
- Use of thermal blankets or sheets to cover the patient right after the assessment
- Protection against hypothermia, especially outdoors or with vulnerable patients (older adults, children, victims of severe trauma)
Hypothermia can worsen shock and impair clotting, which increases the risk of bleeding. That is why temperature control is a direct responsibility of the nursing team during this step.
Completing the primary survey
Once step "E" is done, the professional can start the secondary survey, if the patient is stable. This is where the system-by-system physical exam, a detailed history (AMPLE) and additional tests take place.
Why the XABCDE sequence matters in trauma care
The XABCDE trauma protocol is more than a mnemonic. It is an essential life-saving tool in the initial care of the multiple-trauma patient. Each letter carries a clinical priority that, if neglected, can compromise the patient's stability and even lead to death.
For emergency and urgent care nurses, mastering this sequence is essential to:
- Organize clinical reasoning under pressure
- Carry out fast, effective interventions
- Contribute safely to the multidisciplinary team
- Significantly increase the patient's chances of survival and recovery
If you want to excel in trauma care, whether in emergency departments, ambulances or EMS, knowing and correctly applying XABCDE is a key part of your professional training.
Practical applications of the XABCDE protocol in emergency nursing
The XABCDE trauma protocol goes far beyond theory: it is a practical, vital and decisive tool in the care of trauma patients. Mastering it lets the nurse make quick decisions, save lives and keep care safe even under extreme pressure.
Below you will see how each step is applied in practice, based on real situations from everyday prehospital and hospital care.
X – Exsanguination
Picture a motorcycle crash victim with heavy bleeding from the leg. The nursing team's first action must be to control the hemorrhage at once, applying direct pressure with sterile gauze. If pressure is not enough, a tourniquet above the wound is indicated. This quick intervention buys critical minutes of life.
A – Airway and spine protection
When caring for an unconscious patient after a fall from height, the first action is to check whether the airway is obstructed. Techniques such as the jaw thrust should be used with care, especially if a cervical injury is suspected. Stabilizing the cervical spine with a rigid collar is mandatory throughout management.
B – Breathing and ventilation
A pedestrian struck by a car, for example, may have shallow or absent breathing. Nurses must act quickly with a bag-valve-mask (BVM), supplemental oxygen or by assisting with intubation, if needed. Asymmetrical chest movement may indicate a pneumothorax, which requires immediate intervention.
C – Circulation with control of internal bleeding
A patient who is pale, sweating and cold, with a rapid pulse? These are classic signs of hypovolemic shock. Care includes vital sign monitoring, large-bore IV access, volume replacement as prescribed and continuous oxygenation. Checking for silent internal bleeding is also crucial.
D – Disability
In a traumatic brain injury (TBI), a quick neurological assessment with the Glasgow Coma Scale guides decisions on a definitive airway, sedation and support. Pupil reactivity, agitation and changes in behavior must be watched closely.
E – Full exposure of the patient
In multiple trauma, fully exposing the patient is essential to find fractures, burns or hidden wounds. The team must still work quickly and protect the patient from hypothermia, covering them with thermal blankets right after the inspection. Dignity and privacy must also be preserved.
Every patient is different. That is why XABCDE is not a rigid script but an adaptable structure that guides clinical reasoning and makes sure no vital priority is missed in trauma care.
Master XABCDE in theory and in practice
Quiz: test your knowledge of the XABCDE of trauma
1. What does the "X" in XABCDE stand for?
- a) Exposure of the patient
- b) Rapid extrication
- c) Exsanguinating hemorrhage
- d) Secondary survey
2. What should be assessed in "A"?
- a) Airway with cervical spine control
- b) Breathing and ventilation
- c) Exposure and temperature control
- d) Neurological assessment
3. At which step are pulse and perfusion assessed?
- a) A
- b) C
- c) B
- d) D
4. What does the "E" stand for?
- a) Exudate
- b) Evaluation of consciousness
- c) Full exposure of the patient and temperature control
- d) Endotracheal intubation
Answers: 1 – c; 2 – a; 3 – b; 4 – c.
Source: ATLS (Advanced Trauma Life Support) guidelines.
Now that you know the XABCDE trauma protocol in depth, it is time for the next step: putting this knowledge into practice with safety, precision and confidence. And if you are a nurse or nursing technician in Brazil and will be 25 years old by 12/31/2026, you can become a Health Sergeant in the Brazilian Army. To learn more, read our articles on nursing in the Armed Forces.